
Core i9 9900K is one of the best gaming processors out there. Although, this CPU comes with enough base clock speed to crush any AAA game your throw on it. However, if you need to hit higher frame rates, you can overclock the Core i9 9900K to higher speeds. In this guide, we will discuss how to overclock i9 9900K on an Asus Maximus XI Z390 motherboard.
Now, the Asus Maximus XI is one of the most reliable motherboards for overclocking Core i9 9900K CPU. This motherboard has a fairly simple BIOS interface to safely increase the clock speed of your processor. So restart your computer and head into the BIOS to start the overclocking process.
Overclocking Intel Core i9 9900K on Asus Maximus XI Z390 Motherboard
Here are the steps to follow:
Setting XMP Profile for Ram
The first thing that you need to do is to set the XMP Profile settings for your ram.
- We will start from the BCLK Frequency, and we won’t change this and leave the value at 100. We can adjust this later on if we want to, however this will also change the frequency of other components connected to our motherboard. So, it’s better to leave it at default for now.
- Asus Multicore Enhancement, again we will leave it “Disabled” as we want to configure the settings manually.
- Then we will move on to the SVID Behaviour, again leave it as default.
- Scrolling down, we will come across AVX Instruction Core Ratio Negative Offset setting. You have to assign a value here depending upon the type of CPU cooler that you have. If you have a high-end liquid cooler, you can start from “2”. We are using an air cooler from Cooler Master, so we will assign “1” at this point.
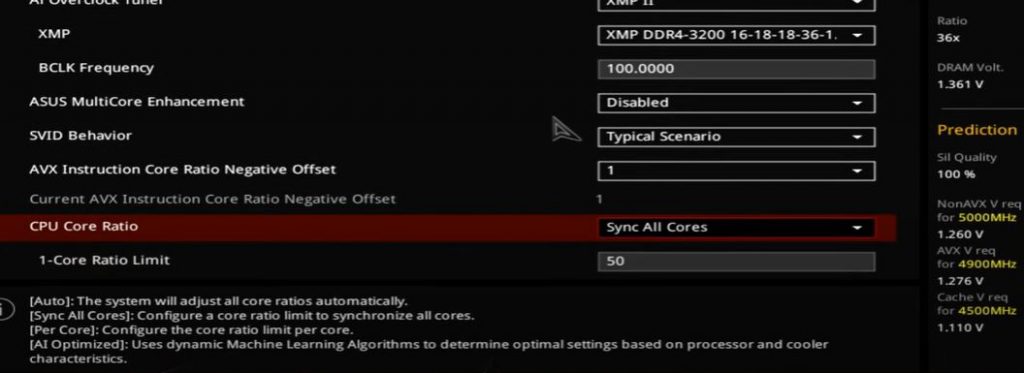
- Set the CPU Core Ratio to “Sync all cores”.
- And then we will set the Core Ratio Limit to “50.
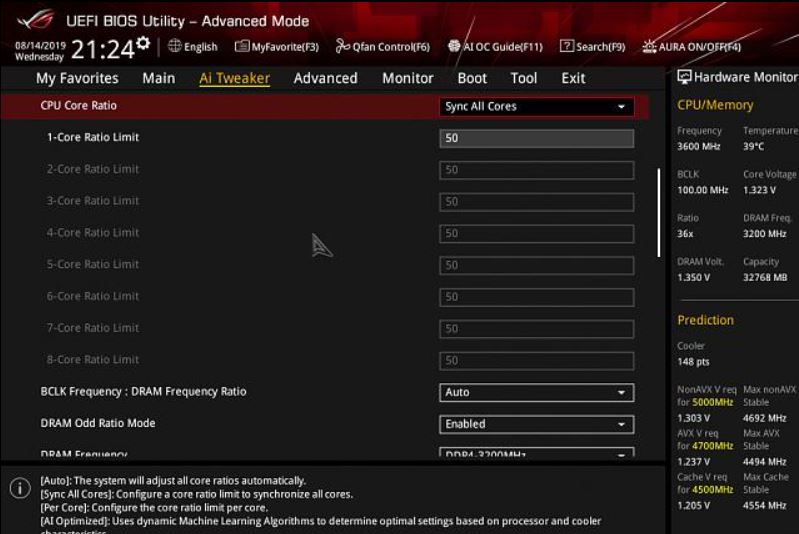
- Set the BCLK Frequency: DRAM Frequency Ratio to “Auto”
- DRAM ODD Ratio Mode set to “Enabled”
- DRAM Frequecy: This is the value that the ASUS Maximum XI motherboard will automatically grab for you. Our system comes with a DDR4 Ram clocked at 3200 MHz. So the motherboard shows this by default. Make sure your DRAM Frequency of your ram matches with the one shown in the BIOS here.
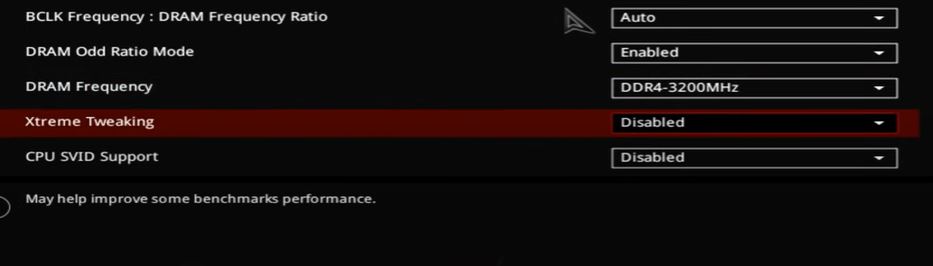
- Then comes the Xtreme Tweaking Setting, you can leave it as “Disabled”. However, if you enable this, you can get a bit more benchmark scores while testing your CPU. It doesn’t makes much of a difference, so we’ll leave it disabled.
Adjusting External Digi+ Power Control
This is the most important part of overclocking Core i9 9900K CPU.
- We will start from CPU Load Line Calibration from “Level 6”. However, you can also set this at “Level 7” if you want. However, to check the stability of the system, it’s better to start with Level 6.
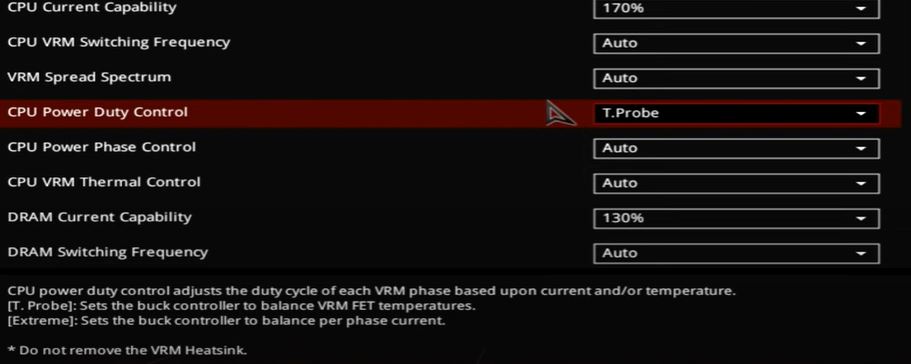
- Set the CPU Current Capability at “170%”.
- Now, set the CPU VRM Switching Frequency & VRM Spread Spectrum to “Automatic”.
- CPU Power Duty Control set this to “T.Probe” (Temperature Probe)
- Leave the rest of the settings to Auto, only change the DRAM Current Capability to 130%. And leave the Boot Voltages at “Auto” as well.
Adjusting Internal CPU Power Management
Let’s jump into the Internal CPU Power Management settings.
- The first thing you will see here is the Intel SpeedStep, now you can leave it as Enable or Disabled if you want. If you Disable this option, it will prevent your CPU frequency from going up and down depending upon different load. Also, disabling the Intel SpeedStep will keep the frequency of your processor at highest independant of the load.
- Leave the Turbo Mode to “Enabled”.
- Don’t change the rest of the settings on this page and leave them as they are. See the image below:
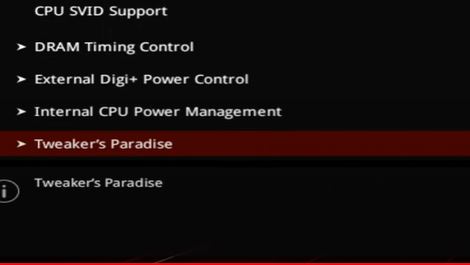
Now go back and head over to the “Tweaker’s Paradise“, there is no need to change any setting here. Everything you see here is grabbed by your XMP Profile. Even if you change anything here, there won’t be any performance benefit you’ll get after overclocking your CPU.
Also, right below Tweaker’s Paradise, you’ll find the AI Features section. Again, there is no need to change any value in that tab as well.
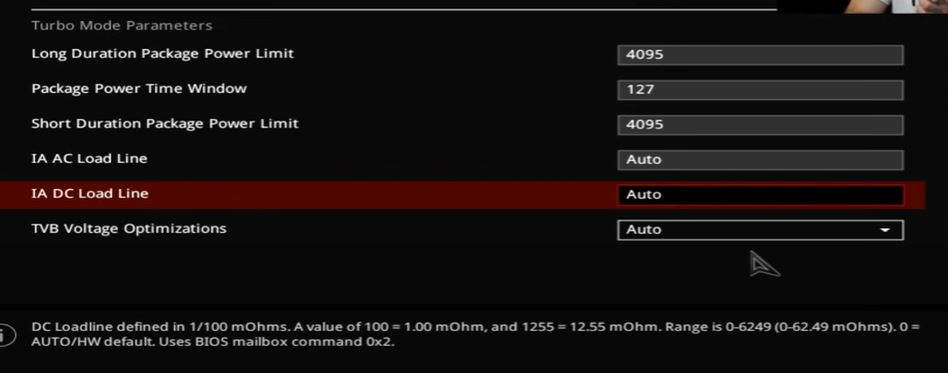
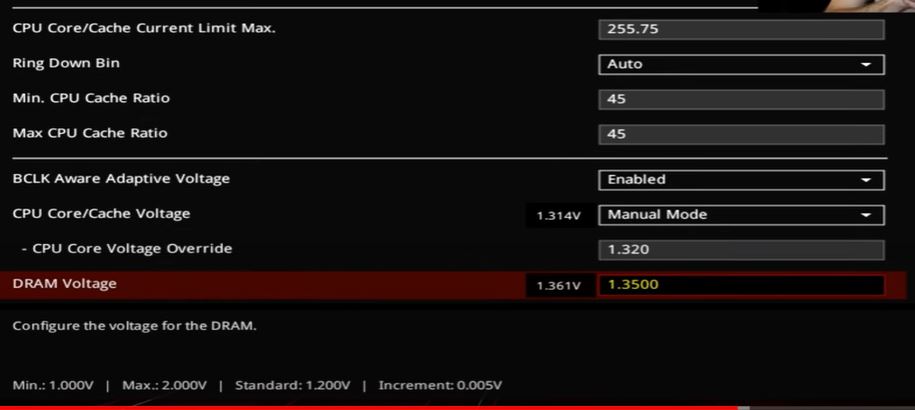
CPU Core/Cache Limit
- Just Below the AI Features, you’ll find the CPU Core/Cache Limit, leave it to default as shown by your motherboard. In our case, it shows a value of 255.75. In most cases, you will see this value as well. However, to confirm this, you can replace the values with “999999999” and you’ll be automatically set back the right value here.
- Leave rest of the settings as you see in the image below. However, when setting the DRAM Voltage, it depends upon the type of cooling you have in your computer. We recommend you to start with lower voltage, generally 1.3V.
- Monitors your temperature and see if your system remains stable at this value. If you have a liquid cooler, slowly increase your voltage in fraction up to the point where your system remains stable. As long your temperature remains within 85 Degrees Celsius, there is no need to worry about.
So we are pretty done with overclocking at this point. There’s no need to change the rest of the settings, just go back and save the settings and restart your computer.
Monitoring your CPU After Overclocking
Once you successfully log back into Windows, it’s time to run the CPU-Z to monitor the voltages, frequency, and temperature of our CPU. Also, you can run several benchmarks and stress tests to see if your CPU is stable under peak loads.
Conclusion
So, now you know how to successfully overclock your Core i9 9900K CPU using Asus Z390 motherboard. Keep in mind that overclocking a CPU generatre more heat, so make sure you have a reliable CPU cooler. Also, start from the lowest settings first and then make your way up to the point where your system is more stable and temperatures are under 85 Degrees Celsius. Also, read about overclocking your CPU without BIOS in this guide.