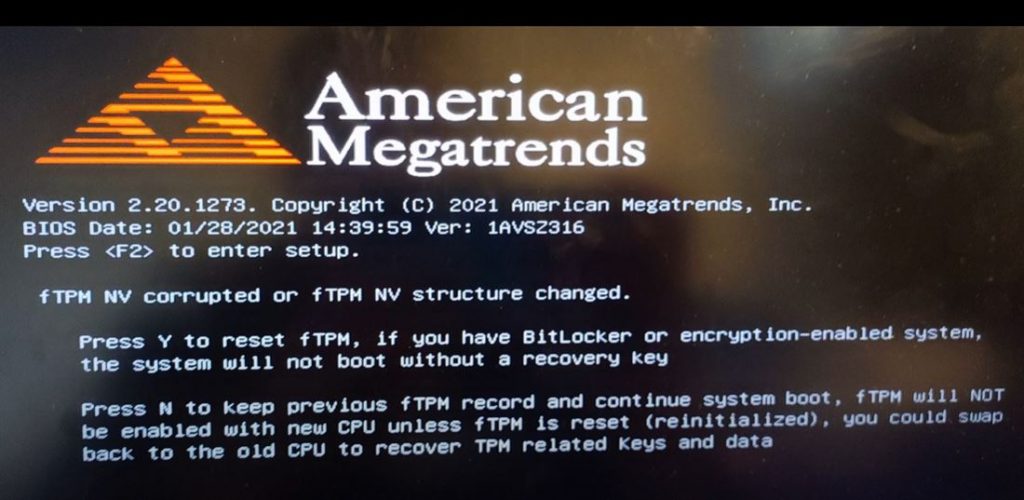
The first time I was greeted by fTPM NV error was two years ago when I had an ASUS gaming laptop. As soon as I powered on my laptop, I was welcomed by fTPM NV Corrupted or fTPM NV structure changed message. Although, there was an option to bypass this message by pressing “N”, which then takes you to the loading screen where you need to enter your PIN. But even after entering the PIN, the system reboots and you see the same type of error.
So what’s the real cause behind fTPM NV Corrupted or Changed error message? How to fix a “New CPU installed fTPM NV corrupted” error? And what measure you could take to prevent this error from occurring again? We will discuss this in detail here.
Before troubleshooting the issue, let’s learn a bit about TPM:
What is TPM
TPM or Trusted Platform Module helps to improve the security of your system. It’s the type of service used by famous encryption tools like BitLocker, McAfee, Check Point, Windows Hello, etc. So, encryption tools use TPM in order to create and store cryptographic keys.
TPM acts as a security processor to prevent any unauthorized access to your operating system and firmware. So, if someone tries to peek around into your machine, he’ll have to enter the decryption key which is stored in the TPM, or else he would not be able to access your system. It’s simple
TPM chip is integrated on Intel and AMD motherboards since 2005. The most recent version, TPM 2.0 was released back in the year 2016.
fTPM or firmware TPM is controlled by the Intel or AMD CPU that you have in your computer.
Main Issue Causing fTPM Corrupted or Changed Error
According to my experience, I saw fTPM this error message after I overclocked my processor. But it may show up out of nowhere as well, even if you don’t play with your BIOS settings at all. Some users have even said that they shut down their computer and the next time they turned it on, they came across fTPM NV corrupted message.
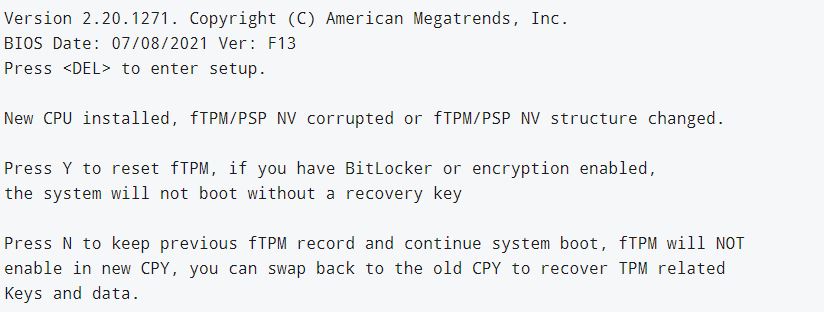
Therefore, if you see the fTPM NV Corruped error along with “New CPU Installed“, then it might be due to the fact that you’ve overclocked your CPU. And this type of message would be more common if you have BitLocker encryption enabled on your system.
Another reason behind this could be Windows 11. Some users have to enable fTPM in BIOS to boot up Windows 11. So every time you boot up, your system finds your CPU as new hardware.
Fixing the New CPU Installed fTPM NV Corrupted or Changed Issue
Don’t worry, there are some quick solutions to get rid of this error:
Updating BIOS
Sometimes errors usually show up at the bootup screen due to incompatibility of newer hardware with old motherboard BIOS drivers. The fTPM error mostly shows up on motherboards backed by American Megatrends technology. So, updating your motherboard BIOS drivers could fix this issue.
Before updating your motherboard BIOS drivers, try to reload the default settings and see if that works for you. Also, leave the CSM in BIOS disabled/off and see if prevents the error message from popping up again. If these methods do not work, then at the last go for a BIOS upgrade and see if it works.
If you are using Intel or AMD motherboards, then it’s better to download and install the latest chipset drivers. This may or may not kill the problem, but at least you’ll have no doubt in mind that there is nothing wrong with your BIOS.
Precaution: If you are going to update your BIOS, then make sure to first decrypt your drive, disable the fTPM, and then update the BIOS. If you’ll just disable the fTPM right away and move on to BIOS update, you’ll run up with serious issues later on. And this may end up with fTPM NV Corrupted or Changed message at the system startup
Disable fTPM in BIOS
This is the most effective solution to say Goodbye to fTPM related errors on system startup, including “New CPU installed fTPM NV corrupted”. All you need to do is to restart your computer and enter it into the BIOS. Now every motherboard manufacturer has its own short key to access BIOS.
- HP: ESC or F10
- Acer: F2 or DEL
- Dell: F2 or F12
- ASUS: F2
- Lenovo: F2 or Fn + F2
- MSI: DEL
Once you get into the BIOS, move to Advanced Settings or CPU Configuration option, here search for the Security Device Support and “Disable” it.
Save your BIOS settings and restart your computer.
Dealing with BitLocker
If somehow you’ve encrypted your computer with BitLocker encryption software, then you’ll have to enter the 64 character PIN in order to get rid of this error.
So at this point, you’ll need to have the key that was given to you at the time of encryption.
You can log in to your Windows using safe mode and search for the “BitLocker Recovery Key.txt” file in order to access your key.
Here’s how to check if your BitLocker encryption is enabled or not:
- Go to Command Prompt
- Right-click and run as “Administrator“
- And then paste this command manage-bde -status
After this, you’ll see a message like the one below
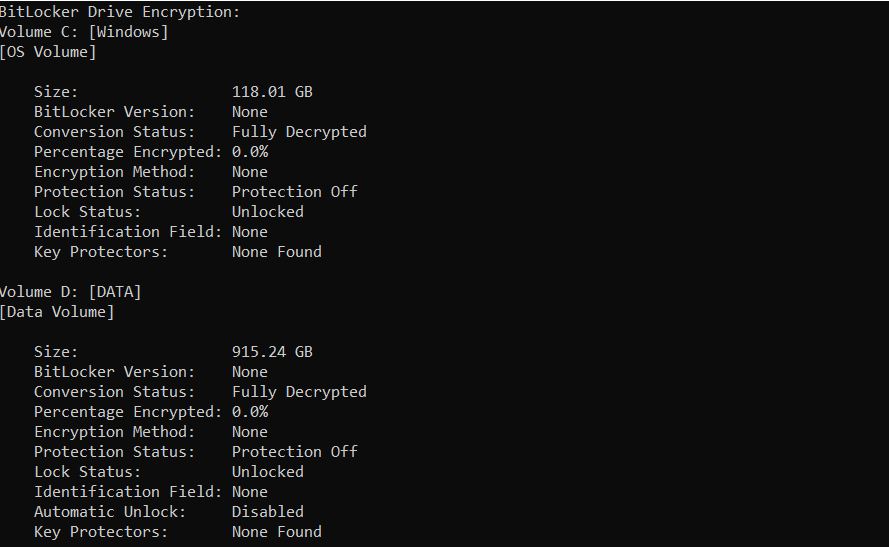
As you can see, BitLocker is not enabled on our system, so the status shows as “Fully Decrypted”.
Conclusion
I hope you are now well aware of how fTPM works and how you can deal with error messages related to it. You can prevent fTPM NV corrupted message by updating your BIOS or disabling the fTPM in the BIOS. If you know any other method to troubleshoot this error, let us know about that in the comments section.